Showing posts with label recipe. Show all posts

Wednesday, January 9, 2013

Flax Seed Skillet Bread

So we acquired a beautiful cast iron skillet a little while ago and Matt has been itching to try it out. Cast iron has a real mystical quality. It seems like anything you make in cast iron will no doubt taste better than if you used anything else. Tonight turned out to be the time to experiment. We were making cajun beans in our crockpot and needed a nice bread to go with it. Cornbread is the obvious choice, but we didn't have any cornmeal. Alright, Matt's solution? Make the bread with flax seed instead. This version of a skillet bread is definitely delicious, and it has a bunch more of that magical nutritious stuff than your typical cornbread. Here's the recipe!


Flax Seed Skillet Bread

What you need:

1/2 cup margarine, melted
2/3 cup sugar
2 eggs
1 cup butter milk (or 1 cup milk with 1 Tb vinegar)
1 teaspoon baking soda
1 cup whole wheat flour
1/2 cup all-purpose flour
1/2 cup milled flax seed
1/2 teaspoon salt

Directions:

Melt margarine. Stir in sugar. Add eggs and beat until blended. Combine buttermilk with baking soda. Add to egg mixture. Stir in dry ingredients until blended. Pour into 9x9 pan (or skillet!). Bake at 350 for 30 minutes. (Shorten cooking time to 25 minutes if you use a cast iron pan). And enjoy!

Thursday, February 16, 2012

A Busy Valentine's Day (plus an easy cake recipe!)

We had a real adventure this year on Valentine's Day. Since the beginning of the school week is especially busy for me, I got up early to try to get a heads up on all of my homework. As a result, I was really tired all day. After I took a midterm, I ran home for a one-hour break in my day to bake a cake. I decided I really wanted to use our new bundt pan, so I made a classic recipe from my Mom. (I'll put the super easy recipe at the bottom of the post.) Fortunately, our oven cooks really really fast (is it normal to have to shave off 2-10 minutes off of every baking time?) so I was able to get back to campus in time to meet with Matt for lunch and the campus devotional. 


Our Valentine's bundt cake
Man. Then we had five hours straight of class/work/homework until we could finally get home and relax a bit. I have to admit that I was a bit cranky by the time I got home, but Matt was so sweet. He had bought me some fudge (he certainly knows me well!), a copy of Thomas S. Monson's biography (so excited!!!), and the children's song book from our church. Since we are teaching the Sunday lessons for the six year olds in our congregation, this will really come in handy. It was so thoughtful! I bought Matt some chocolate covered cinnamon bears (a BYU classic) and made him some "love checks" that Matt can redeem for kisses and breakfast in bed and such. So cheesy, but certainly Valentine's Day appropriate :)


Once we had a chance to dress up for dinner, we had to catch the bus since we still don't have a car. Ten minutes and $4.50 later, we arrived at Red Lobster. We were trying to use a gift card my grandmother gave us for Christmas, but the waiting time at the restaurant was almost 2 hours! Wow. It was really cold outside and I was freezing in my skirt, but Matt, in his wonderful, eternal optimism was able to find a great place with a reasonable waiting time. We finally decided on California Pizza Kitchen, which was DELICIOUS. Their artichoke pizza is to die for! It was so so perfect. We had a wonderful waiter and 4 glasses of mango and peach lemonade each! Then we were able to go home and devour the cake. It was wonderful. Valentine's Day is one of my favorite holidays and I am so glad that Matt made it special this year. You know you've found the right person when they help you have fun despite the chilly air and long restaurant wait times. I'm one lucky duck.


At the bus stop :)


Recipe for Lemon Blackberry Bundt Cake


What you need:
One box of lemon cake mix
3 eggs
1 can of blackberry pie filling


Directions:
Mix ingredients in a bowl and pour into a well greased bundt pan. Bake according to directions on the box. To add a bit more deliciousness, I topped ours with a lemon glaze (lemon juice and powdered sugar). And that's it! It's yummy and very moist.

Monday, February 6, 2012

The Best Bean Burgers

It's been a while since we posted a recipe and this particular one has recently become a favorite. We really love bean burgers and we had a recipe that we used fairly regularly. Then, the website where we usually find our recipe was down. It was definitely a bummer, but then we found a recipe that we like even more on Allrecipes.com. This one uses more veggies and it's delicious!

Here's what you need:
  • 1 (16 ounce) can black beans, drained and rinsed
  • 1/2 green bell pepper, cut into 2 inch pieces
  • 1/2 onion, cut into wedges
  • 3 cloves garlic, peeled
  • 1 egg
  • 1 tablespoon chili powder
  • 1 tablespoon cumin
  • 1 teaspoon Thai chili sauce or hot sauce
  • 1/2 cup bread crumbs
 
Directions

  1. If grilling, preheat an outdoor grill for high heat, and lightly oil a sheet of aluminum foil. If baking, preheat oven to 375 degrees F (190 degrees C), and lightly oil a baking sheet.
  2. In a medium bowl, mash black beans with a fork until thick and pasty.
  3. In a food processor, finely chop bell pepper, onion, and garlic. Then stir into mashed beans.
  4. In a small bowl, stir together egg, chili powder, cumin, and chili sauce.
  5. Stir the egg mixture into the mashed beans. Mix in bread crumbs until the mixture is sticky and holds together. Divide mixture into four patties.
  6. If grilling, place patties on foil, and grill about 8 minutes on each side. If baking, place patties on baking sheet, and bake about 10 minutes on each side.
Since it's not really grilling weather right now, we just baked them in the oven. So good! I was a little worried about them being really spicy, but the beans and veggies really balanced out the flavor. We loved them. They're especially good with relish on top.


Saturday, October 8, 2011

Zucchini Marmalade, seriously!

Zucchini marmalade may sound really strange and not-at-all appetizing, but it was a surprising success! My Granny and I found the recipe in a cookbook at a drugstore. I think the reason we were brave enough to try it is because zucchini seems to go really well with other dessert-like recipes: chocolate cake, cookies, and of course, zucchini bread. Also, Matt and I have been seriously overrun by zucchini and we definitely had enough to grate down to size for marmalade. If you are looking for a new, interesting canning project that can use up some zucchini, this may be it!

  What You Need:
6 cups peeled and finely grated zucchini
1 cup water
6 cups sugar
2 Tbs. lemon juice
1 (20 oz.) can crushed pineapple
1 (3 oz.) box peach gelatin
Directions:
In a saucepan, bring water and zucchini to a boil. Gently boil for 10 minutes. Add sugar, lemon juice, and pineapple. Cook another 10 minutes. Stir in gelatin and cook 10 minutes more. Ladle into the sterile jars. Wipe the tops of the jars and securely close the lids. Cool completely.
It is seriously yummy!

Thursday, August 25, 2011

What to do with your Zucchini: Part Two

So last week, our garden exploded with zucchini. We gave three away to different friends (hopefully we didn't seem too desperate) and kept three for ourselves. We made a delicious zucchini parmesan recipe that was super tasty and super filling. It also worked out really well because the zucchini we had was 5-6 inches in diameter....huge! We only had to eat one or two pieces for each meal. I love meals that can stretch out over a couple of days!

Since we still had zucchini left over, we decided to try another recipe for dinner. Since some lovely friends bought us some spices for our wedding, we've been getting the Penzey's Spices catalogue each month. Despite tempting me with their delicious spice blends, I love looking through it because costumers always send in recipes. I am a sucker for new recipes and these always look so gourmet and wonderful. This Easy Cheesy Zucchini Bake definitely lived up to its name: it is easy and delicious! The recipe is attributed to a Karen Niessing and I hope she doesn't mind that I'm posting it here.

What you need:
2 medium tomatoes, cut into wedges *
2 zucchini, sliced
2 yellow summer squash, sliced **
1/2 tsp. thyme
1 tsp. basil
1 tsp. garlic powder
1/2 cup shredded cheddar cheese
1/2 cup grated Parmesan or Romano cheese
1/3 cup bread crumbs
1 cup mozzarella cheese

* The recipe says to peel them, but I like the skins.
** We used one large zucchini for the whole recipe (so no summer squash) and it was still great!

Preheat oven to 350. Combine tomatoes, zucchini, squash, seasonings, and cheddar cheese. Place in a 1 1/2 quart baking dish or 9 x 9 glass pan (we used a bigger pan because we had a LOT of zucchini). Top with Parmesan and bread crumbs. Bake at 350 for 45 minutes or until the vegetables are tender. Sprinkle the mozzarella cheese over the top and let stand 5 minutes so the cheeses melts before serving.

Enjoy! This is a good one. And pretty healthy too--just go lighter on the cheese if you want to make it even better for you!

Here is a picture update of our tiny onions. They are tasty though!

Thursday, August 4, 2011

Our Little Creperie

One of our dreams for the future is to retire and open a little creperie (a restaurant that sells crepes!). We started planning after we visited the cutest creperie in Charlottesville, VA during our honeymoon. It is called The Flat and you can see a picture here. The menu is really simple and features both savory and sweet crepes. Matt and I stopped there for dinner one night and fell in love. My crepe had ham, fresh brie, and apple slices. Matt's crepe had sausage, brie, and spinach. They were both delicious! Of course, the dessert crepes were to die for as well. Who can beat Nutella and fresh fruit? (As you can tell from previous posts, I am definitely obsessed with Nutella).


Matt and I have made crepes a few times now. Usually, we eat them in the morning and just mix fruit, jam, honey, Nutella, peanut butter and such for a wonderful breakfast. Today we made some crepes for dinner. We decided on ham, swiss, and apple as the dinner combination. They were fabulous! The great thing about crepes is that they can be very inexpensive. The cost depends entirely on what you decide to put in them.

The talented chef.

Here is the recipe we used to make the crepes. We got it from a book called Teens Cook that I got for Christmas many years ago. It actually has some great recipes in it. I use it all the time.

Ingredients:
4 eggs
1 1/3 cups milk
2 Tb. oil
1 cup flour
1/2 tsp. salt

Place eggs in a blender. Add the milk, oil, flour, and salt and blend until smooth. Since we don't have a blender (see the smoothie post), we just beat the mixture really well. A blender would probably make sure there are no lumps though.

Heat an 8-inch nonstick saute pan over medium heat. Place a small amount of oil or butter on a paper towel and rub it over the surface of the pan. Pour in 1/4 cup of the crepe batter and quickly swirl the pan,  making sure the batter covers the entire bottom of the pan (the crepe should be very thin). Cook for 2 minutes (or until the edges start curling up a bit). Loosen the edges with a spatula and turn the crepe over. Repeat the process with all the batter. You can just stack the cooked crepes on top of each other--just be careful pulling them apart when you are ready to eat.

When all the crepes are finished, put whatever you want inside. It will all be delicious, we promise.

I love that we are both wearing our BYU football shirts. I think that really highlights our sophistication and grace :)

Sunday, July 24, 2011

Our First Harvest (and Zucchini Bread, of course!)

Each of our zucchini plants has at least one zucchini growing. We have four zucchini plants and some are definitely doing better than others. We have two plants that have produced giant zucchini--10-12 inches long! Today we harvested one of our big zucchinis to make zucchini bread. Yummmm! We are saving the next one for when Jessica's grandmother comes to stay at the end of this week. So, as an incentive for anyone coming to stay, we will bake you zucchini bread/cake/or anything else you may want. We also have tomatoes that are starting to turn red, so we can do salsa too. We are definitely excited to see how creative we can get once the zucchini plants really go crazy. Fortunately, other wonderful people have filled the internet with delicious recipes. We'll probably have a few more recipes to post as the summer goes on. Here are some pictures of our successful wrangling of a giant zucchini:

 It was 10 inches long!

Unfortunately, Matt has his eyes closed in this one. In his defense, it seems to be a family trait.

Here is the delicious recipe we made this afternoon. It is a favorite recipe from Matt's family.

3 eggs
1 c. sugar
1 c. brown sugar
1 c. oil
3 c. grated zucchini
2 tsp. vanilla
3 c. flour
1 tsp. baking soda
1 tsp. baking powder
1 tsp. salt
3 tsp. cinnamon
1 c. coconut
½ c. nuts (We left these out. Nuts are expensive!)

Mix in order given. Bake in 2 large loaf pans. Bake at 350 for 1 hour. We greased the pans, just to make life easier.

This recipe is really easy and super moist. Definitely recommended!

 Pouring batter into the bread pans.

Wednesday, July 20, 2011

Indulgence: The 5-Minute Nutella Mug Cake


I found this recipe a while ago somewhere online and thought "where have you been all my life?". I've only made it once before because too much of this heavenly dessert would certainly be bad for my health. Enjoy, sparingly :) 
Nutella Mug Cake
Ingredients
4 tablespoons self rising flour (I used normal flour and it turned out great)
3 tablespoons white granulated sugar
1 egg
3 tablespoons cocoa powder
3 tablespoons Nutella
3 tablespoons milk
3 tablespoons olive or vegetable oil
Method
Combine all ingredients in a large coffee mug. Whisk well with a fork until smooth. Microwave on high for 1 1/2 – 3 minutes. (Mine took 1 1/2 minutes with a little yummy gooeyness on the bottom.) 
Note: Depending on the wattage of your microwave, you may have to increase cooking time. Also, the measurements aren't too delicate. I already took out one tablespoon of sugar from the original recipe and it still tasted delicious. 
Makes 1 very large serving. Or 2 normal servings. If you're anything like us, you share everything anyway :)


Here is the link to the original post: http://blogs.babble.com/family-kitchen/2011/03/15/nutella-mug-cake/

There are several other mug cakes on the site if you aren't a Nutella fan. But if you aren't a Nutella fan, you should reconsider.

Also, here is an update on our garden: the tomato plants have recently exploded with lots of little tomatoes, but none of them are ripe yet. The zucchini, however, are doing just fine. We have three that are almost there! Look at that beauty!


Saturday, July 16, 2011

Potstickers are delish (but we all know that!)

One of my favorite memories as a kid was watching my mom make 500 (it was a lot) potstickers, or as we called them, gyozas. They are delicious. Matt and I decided we wanted to make some for dinner this week. We looked at a few recipes and tweaked them to come up with one that works great for our little family.

Here it is:
1 clove garlic
3 green onions (we added more and it was tasty)
1 egg yolk
1/2 tsp. salt
1 lb. ground pork
1 package wonton wrappers
2 Tb. vegetable oil


Directions:
Chop the garlic finely. Defrost the pork. Cut off the root ends of the green onions and slice the white part and up to one inch of the green. Add the garlic, green onions, egg yolk, salt, and ground pork to a bowl and mix it together. It seems gross, but mix it with your hands! It works better this way.


Get out the wonton wrappers. Dip a finger in water and wet the edges of the wrapper. Place a small spoonful of the pork mixture in the middle of the wrapper and fold it in half, pressing the edges of the wrapper together. You should be able to finish a whole package of wrappers with one batch. Prepare a deep sided pan and add 2 Tb. of vegetable boil. Place a few (8-10) into the heated oil. Fry potstickers on both sides. Then (this is the fun part) add 2 Tb. of water to the pan and quickly close the lid. The potstickers will sizzle for a while. Once the noise dies down, they should be done! Take off the lid carefully because the oil will spit a bit. If you have more than you want to eat, freeze the leftover, uncooked potstickers. Then you can pull them out for a quick meal later!

Sunday, July 10, 2011

Smoothies...in a food processor

We have a lot of great appliances. We even have a quesadilla maker our upstairs neighbors gave us. But one thing we don't have is a blender. So when we got home and it was really, really hot out, I decided to try making smoothies in our food processor. Why not? It actually worked out awesomely.


We had some frozen strawberries from when they were really cheap at the grocery store. We bought three cartons and since there was no way we could eat them all before they went bad, we froze two of them. Frozen berries are THE BEST for smoothies. We also had some yogurt on hand, so I added some Key Lime yogurt to one batch. It was delicious! Since I also like my smoothies a little sour, I added some Tang to the other batch. They both turned out really good. So, now we know that we can get a good-sized smoothie out of a small food processor. Maybe we won't need to buy a blender...


Thursday, July 7, 2011

Summertime and the living's easy (Plus: Guava Chiffon Cake!)

Well, we are loving our summer vacation. We're still working (and in Matt's case, taking a class), but we are also being spoiled silly with all the trips we're taking to see family. We've seen lots of grandparents, aunts and uncles, cousins, and of course, we saw our parents and siblings recently too. Just this last Sunday, Matt's sister Liesle flew in and visited for a few days before we dropped her off at the MTC (Missionary Training Center) this morning. We visited with family, went shopping at the mall (Matt waited outside and read), and visited the Salt Lake Temple. We had so much fun! She is going to be an awesome missionary!


Aside from family trips, we are also having lots of fun with our friends in the neighborhood. We had a great luau with our ward, complete with the most delicious guava chiffon cake you can imagine. I signed up to make it just so that I would have the recipe and I could make it again later. Because, you know, I only do these things selfishly :)


And since I won't tantalize you with the mention of such a decadent cake and not give you the recipe, I'll add it here. Just so you know, this recipe is more complicated and involved than the things we usually bake. But sometimes, you just need to go the extra mile. Especially for dessert :)


Ingredients:
•    1 package Yellow Cake Mix
•    1 1/3 C Guava juice (Kern’s Nectar)***
•    3 Eggs
•    1/3 C Vegetable oil

•    1 small package Strawberry Jello

•    1 8-ounce Package cream cheese, softened
•    1/3 C Sugar
•    1 tsp Vanilla
•    1 small package Cool Whip, thawed

•    2 C Guava juice
•    1/2 C Sugar
•    1/4 C Cornstarch

***Overall, you will need about three cans of Guava nectar (if you buy the soda can size at the store). You'll have a little bit left over.

Directions:
1. Combine cake mix, juice, eggs and oil.  Pour in 9x13 prepared (greased/floured) baking pan and bake according to instructions on the box.
2. In small saucepan, boil jello mixture (just jello powder and boiling water--don't add the cool water) according to instructions. Poke holes in cake and pour jello mixture over the top. Cool completely in fridge.
3. In a medium mixing bowl, beat cream cheese with hand mixer until fluffy. Add sugar and vanilla and beat in. Slowly fold in the Cool Whip and refrigerate until ready to use.
4. In a medium saucepan, bring the 2 cups guava juice and sugar to a boil. Make a paste out of the cornstarch with a small amount of water. Stir in the cornstarch mixture. Return to heat and bring back to a boil and boil for one minute. Cool slightly in refrigerator.

To assemble cooled cake:
Thickly ice the cake with all of the cream cheese mixture. Glaze the top of the cake with guava gel. Refrigerate until ready to serve.


This cake is THE BEST. It is most delicious chilled. Prepare to be amazed. This is definitely the recipe of the summer so far!

Saturday, June 4, 2011

Friends and "Fat Boys"

A few weeks ago, one of our best friends, Sydnee Bowler got her mission call. Czech Republic! How awesome is that? Anyway, we had to invite her over to our little apartment: 1) because she was going home to Colorado for the rest of the summer and 2) she had never had dinner with us at our place. So, we decided to make Fat Boys. I realize the name sounds horrible, but it was a classic lunch for Matt when he went to a community college in Virginia and we wanted to see if we could make them! Basically, Fat Boys are rolls of dough with cheese and toppings inside. We also put some olive oil and Italian spices on the top to get it crispy. Then, you dip the sliced up Fat Boy in marinara sauce. DELICIOUS.

Here is the recipe:
1 cup of warm water
2 1/2 cups of flour
2 tsp. (or one packet) yeast
1 pinch of sugar
1/4 tsp. salt

***Matt makes the dough in our house and he doesn't really follow recipes. So...the measurements are approximate. You may need to add a little more flour or water to get it to the right consistency. Matt says the dough should be pretty soft. Play with a little bit to get it right if you need to.


Directions:
Preheat oven to 400. Mix warm water and yeast (and the pinch of sugar--this helps the yeast rise faster). Let it sit five minutes. Add flour and salt. Knead for three to five minutes. Let rise in a warm place until it is doubled in size. Roll flat and separate into rectangles (they should be longer than they are wide). Then fill the middle of the dough with cheese and desired toppings. Roll the dough and pinch the sides together to seal the roll. Brush the top of the roll with olive oil and seasonings. Slit the top of the roll a few times to let out steam while it is cooking. Place in oven for 11 minutes (or until brown and crispy on the outside). When they are out of the oven, slice them up and dip them in sauce. Enjoy!

Thursday, May 5, 2011

4 Ingredient Peanut Butter Cookies


Sometimes we get invited over to someone's house on really short notice. (Or we forget about ward parties and we signed up to bring something...) Since we try not to go to a dinner or party empty-handed, we have a few things that we can whip up really fast. This recipe is one of them--especially since there are only four ingredients and we usually have all of them on hand.

Here's what you need:

1 cup peanut butter (we like the chunky kind)
1 egg
1 cup sugar
1 tsp vanilla

Mix all the ingredients, form into balls on a cookie sheet, criss-cross the tops with a fork and pop them into the oven. We cook them for about 10 minutes at 350 degrees. This recipe makes 18-ish cookies, depending on the size you make the balls of dough. I love it--it is just so simple! We also get compliments when we bring the cookies over when they're still warm. Probably because peanut butter is just so delicious.

Tuesday, April 26, 2011

Hot Cross Buns: The Verdict


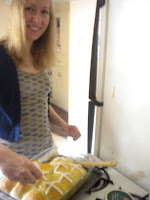
These were soooo good! Definitely my favorite part of our easter dinner. The dough is super soft and fluffy. The buns are not too sweet and go perfectly with the icing. We made them Sunday morning, then ran them over to some of our friends before church. They all loved them too. We decided to make them a second time for a ward party on Monday (it's still Easter-time, right?). We got some great compliments and I was asked for the recipe a couple of times. Not bad! This is definitely going to be a continuing tradition.

Here is another link to the recipe. And here are some of our notes: We didn't add dried fruit. Matt wanted to, but he didn't know when to add them in the cycle so it didn't happen. I just "forgot" to put them in the second time. Although I love raisins, the buns were so good the first time, why add anything else? Besides, we like to save our raisins for granola :)

Also, we didn't have cardamom by itself, so we used Penzey's Baking Spice, which is a mix of cinnamon, cardamom, mace, and anise. I'm pretty sure just cinnamon would taste great too. We also split the dough into more than 12 buns. The dough rises a LOT and we wanted to be able to share. We made 16 the first time and 24 the second. Finally, we didn't really follow the instructions for the frosting since the recipe makes a lot. We just mixed powdered sugar and milk until we got the consistency we wanted. Happy baking!

Saturday, April 23, 2011

Easter Planning

So we are busy planning our first Easter together. We want to make Easter a really special holiday for our family. Christmas always comes with so much anticipation--but shouldn't Easter be just as exciting? It's springtime, school is finished, and we can celebrate our Savior's resurrection. What a wonderful holiday. Since we can't leave out the egg hunt, I've bought some bright plastic eggs and filled them with mini Cadbury eggs. What else?

We are also really excited to plan our Easter menu. Since this is our first major holiday together (aside from Christmas, which we spent with our families), it has been really fun to decide what we want to cook together. Here's what we've decided on so far:

--Ham with an Apricot Glaze
--Flatbread (unleavened bread)
--Asparagus
--Hot Cross Buns

I'm especially excited for the hot cross buns. This recipe has all sorts of yummy spices! It will be our first time using the dough cycle on our bread machine--we'll let you know how it works out! What are some other recipes and traditions that your family loves on Easter?

Friday, April 22, 2011

Homemade Tortillas

This is our favorite recipe to give to friends. It is tasty and basically fool-proof. Matt learned this while he was on his mission. The biggest thing to remember for this recipe is consistency. Although we've made up a recipe for 12 tortillas, you could probably just throw all these ingredients in a bowl until you get the amount of dough you want.

What you need:
2 cups flour
3 Tbs oil (we like olive)
1 tsp salt
1 cup boiling water


What to do:

While the water is boiling, mix the first three ingredients. Add the boiling water. The dough will be a little sticky. Lightly dust it with flour and knead it until it no longer clings to your hands. Form the dough into balls about the size of an egg. Use a flour-dusted rolling pin to flatten the dough - the thinner the better! Place the flat tortillas into a pan on the stovetop and cook until bubbly and browned. Don't cook too long or they get hard. To keep the finished tortillas warm and soft, cover them with a damp towel.